Better Wing Cases
Do you want to tie better wing cases on your flies? Master fly tier Skip Morris tells you his secrets for getting consistently good wing cases every time.
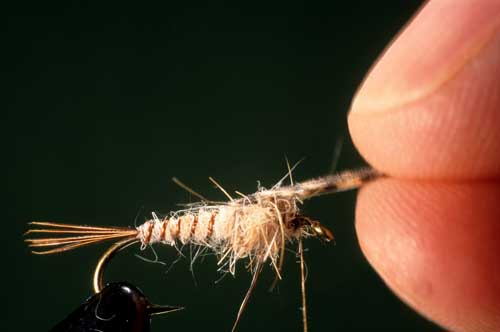
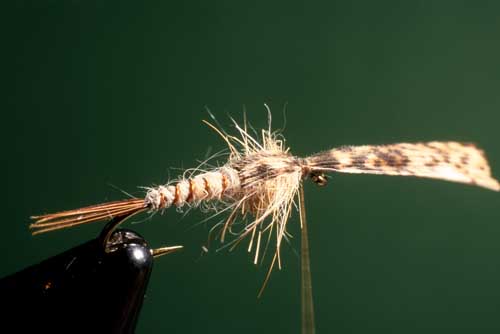
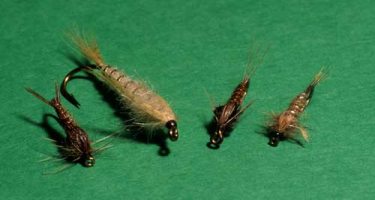 A few popular artificial nymphs which, like most,
include wing cases humped over their backs.
Wing cases are simple in design, but making ones that look good and endure isn't quite so simple.
The suggestions and strategies to come can really help you build better wing cases everytime you tie.
What is a Wing Case?
Immature mayflies, stoneflies, and some other aquatic insects carry the wings for their future air-world existence packed tightly in a skin-purse, like a tiny parachute, on their backs.
This skin-purse is called a "wing case",
and it's usually darker than the rest of the insect.
*Note:
The standard way the fly tier imitates a wing case on an artificial nymph is with a section or bunch of feather-fibers, folded over the front section of the fly.
Making the standard wing case is by its nature an easy and simple-enough operation, but there are a lot of ways to make the process difficult and inefficient, and, unfortunately, too many tiers find those ways.
I'll tell and show you what I've learned over more than 35 years of tying about making, with ease, neat, durable, and better wing cases on artificial nymphs.
The Basics for Better Wing Cases
After the lead (or lead-substitute) wire is wound up the hook's shank (lead is optional on nymphs, so there may be none), and after the rear half of the fly is completed, it is normally time to bind a bunch or section of fibers atop the lead (or atop the shank, if there is no lead), fibers which will later become the wing case.
The fibers should project back, off the hook's bend.
Then the thorax is completed in whatever manner the fly pattern calls for—dubbing, chenille, sometimes a palmered hackle over that, and there are other variations. With the thread hanging from just behind the hook's eye, the wing-case fibers are pulled forward and down, then bound at the front of the thorax.
Sound easy to build a better wing case? Sure, if you know how to avoid the pitfalls.
Three Simple Techniques for Tying Consistently Better Wing Cases
When some tiers sit down and run off a half dozen Feather Dusters nymphs, some of the wing cases on them come out just fine without much fussing.
Some of them, however, don't.
So the problem isn't always consistently disappointing results;
sometimes it's inconsistently disappointing results.
And that can be even more frustrating.
So, here's the good stuff, the tactics that will produce consistently
better wing cases:
- First, learn the variation of a technique called the "pinch" used specifically for mounting wing-case materials.
- Second, learn how to bind the fibers at the hook's eye in the manner I'll describe.
- Third, take the time to trim the butt-ends of the wing-case fibers closely, neatly, and to a slight taper, so that the head you form over them will be small, neat, and secure.
So...here's a little primer on the wing-case pinch, before you start tying:
The pinch is a technique based on pinching a material down onto a hook's shank in such a way that it is held firmly in place as it's being
bound on.
Soft materials in particular tend to spin out of position and around a hook as the tier attempts to bind them on. The pinch cures that.
Most wing-case materials are soft, or fairly so, and tend to shift also when the tier wants them to stay in place, and the wing-case pinch cures that.
Here's how you do the "pinch":
 Step 1
1. Hold the wing-case fibers down atop the hook's shank (or atop the lead wrappings, if they were added for weight) between your thumb and first finger.
The fibers should now project back, off the hook's bend. If the fibers are in a flat section, such as a strip from a duck primary feather, try to roll
the section down around the top half of the shank (or lead).
If the fibers are in a bunch, such as hair, simply press them lightly down atop the shank(or, again, atop the lead).
Add one light-tension turn of thread around the fibers.
 Step 2
2. Widen the gap between the joint of your thumb and joints of your finger so that their tips roll forward over the thread-turn.
In other words, bend your thumb and finger so their tips roll forward.
Now the fibers and the thread-turn are back under your thumb-tip and fingertip so that when you pull the thread tight, the fibers will stay put.
So, pull the thread tight.
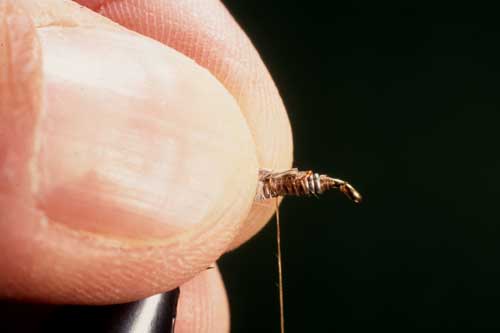
 Step 3
3. Keep the thread tight as you add several tight thread-turns over the fibers, to really lock them down.
The long ends of the fibers should now project back off the bend of the hook, and should be bound right back to the front of the abdomen.
On most nymphs, the abdomen ends in about the center of the hook's shank, or just slightly forward of it.
Now, the next part for building better wing cases...binding the fibers
at the hook's eye:
More than anything else, the manner in which you bind the wing-case fibers at the hook's eye will determine the symmetry and aesthetics of the
finished wing case.
If you can just accept that it'll take an extra second or two to get the job done well, you'll be most of the way to the results you want.
An extra second or two—small price to pay, don't you think?
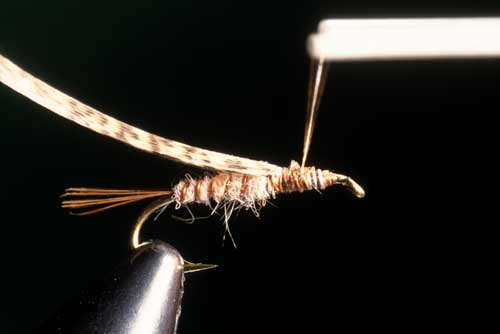
 Step 4
4. Grasp the end of the fibers in your right hand; draw the fibers forward and down atop the thorax.
With your left hand, raise the bobbin and then drape it over the far side of the hook and let it hang.
At this point the fibers should be held lightly forward (if the fibers are taut, they'll be taut in the finished wing case and the strain will make them weak)
and a turn of thread should cross over them, with the bobbin hanging free.
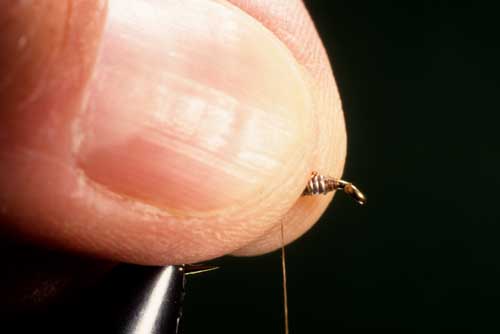
 Step 5
5. Pull down firmly on the bobbin, in turn tightening the thread over the wing-case fibers.
While keeping the tension on the thread constant, add several more turns to lock the fibers in place.
The fibers should have gathered under the thread as they were pulled down to the hook's shank, and because they were held over the hook by your right
hand the whole time, the resulting wing case is even and neat and right on top as it should be.
And the last part to making better wing cases...
trimming the butt-ends of the fibers:
The point here is that if you take a few extra seconds—even one second!—to trim the ends of the wing-case fibers down to small and tapered,
the thread head you build over those ends will also be small and neatly tapered...and easier to create than if the fibers had been roughly cut...and
tougher...and—the point is, take the time and you'll be glad you did.
Really, this is just common sense.
And it's true of all thread heads, those on nymphs with wing cases included.
In Conclusion...
A better wing case on a nymph—big deal. Is fretting over the fine points of some little part of a fly really worth the trouble? Sure it is, if you're a fly tier—what tier wouldn't want to improve the toughness and attractiveness of the flies he or she ties?
None I've ever met.


Click here to hear Skip's interviews on popular podcasts...

*Announcements*
Skip has an essay in Big Sky Journal's annual Fly Fishing issue, called "Montana Hoppers: the Princess and the Brute" released February 1, 2023. Skip rewrote it a bit; I painted and illustrated it here, on our website. Here's the link on our web page to check it out:
 ©Carol Ann Morris
Click here to read Skip's essay Montana Hoppers: The Princess and the Brute...
Skip's latest books:
Top 12 Dry Flies for Trout Streams: How, When, and Where to Fish Them, is now available on Amazon as an ebook...check it out! Click on the links below to go to the information page on Top 12 Dry Flies (the link to Amazon is at the bottom of the page...)
 Top 12 Dry Flies for Trout Streams: How, When, and Where to Fish Them
Click here to get more information about
Top 12 Dry Flies for Trout Streams: How, When, and Where to Fish Them (the link to Amazon is at the bottom of the page)...
Top 12 Dry Flies for Trout Streams: How, When, and Where to Fish Them (the link to Amazon is at the bottom of the page)...
Top 12 Nymphs for Trout Streams: How, When, and Where to Fish Them, 2nd Edition, originally published as an e-book only, is now available on Amazon as a paperback...check it out! Click on the links below to go to the information page on Top 12 Nymphs (the link to Amazon is at the bottom of the page...)
 Top 12 Nymphs for Trout Streams: How, When, and Where to Fish Them (2nd Edition)
Click here to get more information about
Top 12 Nymphs for Trout Streams: How, When, and Where to Fish Them (2nd Edition). . .
Top 12 Nymphs for Trout Streams: How, When, and Where to Fish Them (2nd Edition). . .

Click here to get more information about Skip's e-book,
500 Trout Streams...
500 Trout Streams...
Skip's latest paperback book:
 365 Fly Fishing Tips for Trout, Bass, and Panfish
Click here to get more information about Skip's latest book,
365 Tips for Trout, Bass, and Panfish...
365 Tips for Trout, Bass, and Panfish...
Print Skip's chart for FREE:
Skip Morris's Trout-Fly Proportion Chart
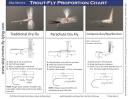
Go to Skip Morris's Trout Fly Proportion Chart
Skip's Predator is available to buy...
Skip's ultra-popular Predator—a hit fly for bluegills and other panfishes and largemouth bass (also catches smallmouth bass and trout)—is being tied commercially by the Solitude Fly Company.
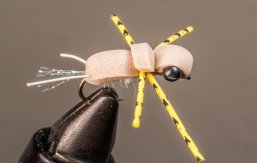
The Predator
CLICK HERE to learn more about or to purchase the Predator...
Learn to Tie Skip's Predator
Do you want to tie the Predator?
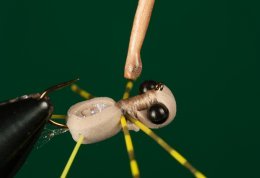
Tying the Predator
Skip shows you how to tie it on his YouTube Channel link, listed below:
CLICK HERE to see Skip's detailed video on how to tie the Predator...